5 Ways to Introduce Reading and Books at the Beginning of the School Year

It’s the beginning of a new school year and you know you want to make books and reading an important part of your classroom environment. But how can you establish that from the beginning? How can you help your students to know that reading is valued in your classroom? How can you encourage a community of readers? Here’s 5 ideas to help you introduce reading and books as a back to school activity.

 
5 Ways to Introduce Reading and Books into your classroom at the beginning of the school year. A back to school literacy and literature post for all teachers.
 

1. Start With A Favourite

You’ve introduced yourself to your students, checked all their names, put books and stationery into some sort of organisation. It’s time to start teaching. You might have a great getting to know your students activity planned, but it’s worth waiting for just a moment to read them your favourite picture book.

Why? First of all, picture books are great transition tools. They show the students that it’s time to move from organisation mode into learning mode. They’re a quiet and calm way to get things moving. Secondly, you’re letting your students get to know you a little through your book - they know that you value reading and that this is one of the books you really value. And finally, it gives you, the teacher, a moment to breathe and enjoy what you’re doing.

As a bonus, it never hurts when someone from administration pokes their head in and sees reading happening on the first day

2. Create a List of Topics to Read About

In the first few days of school ask your students what kind of books they would like to read or what topics they would like to read about. Use this list as a display in the classroom, use it to guide some of the reading choices or book choices throughout the year and return to update it as the year progresses.

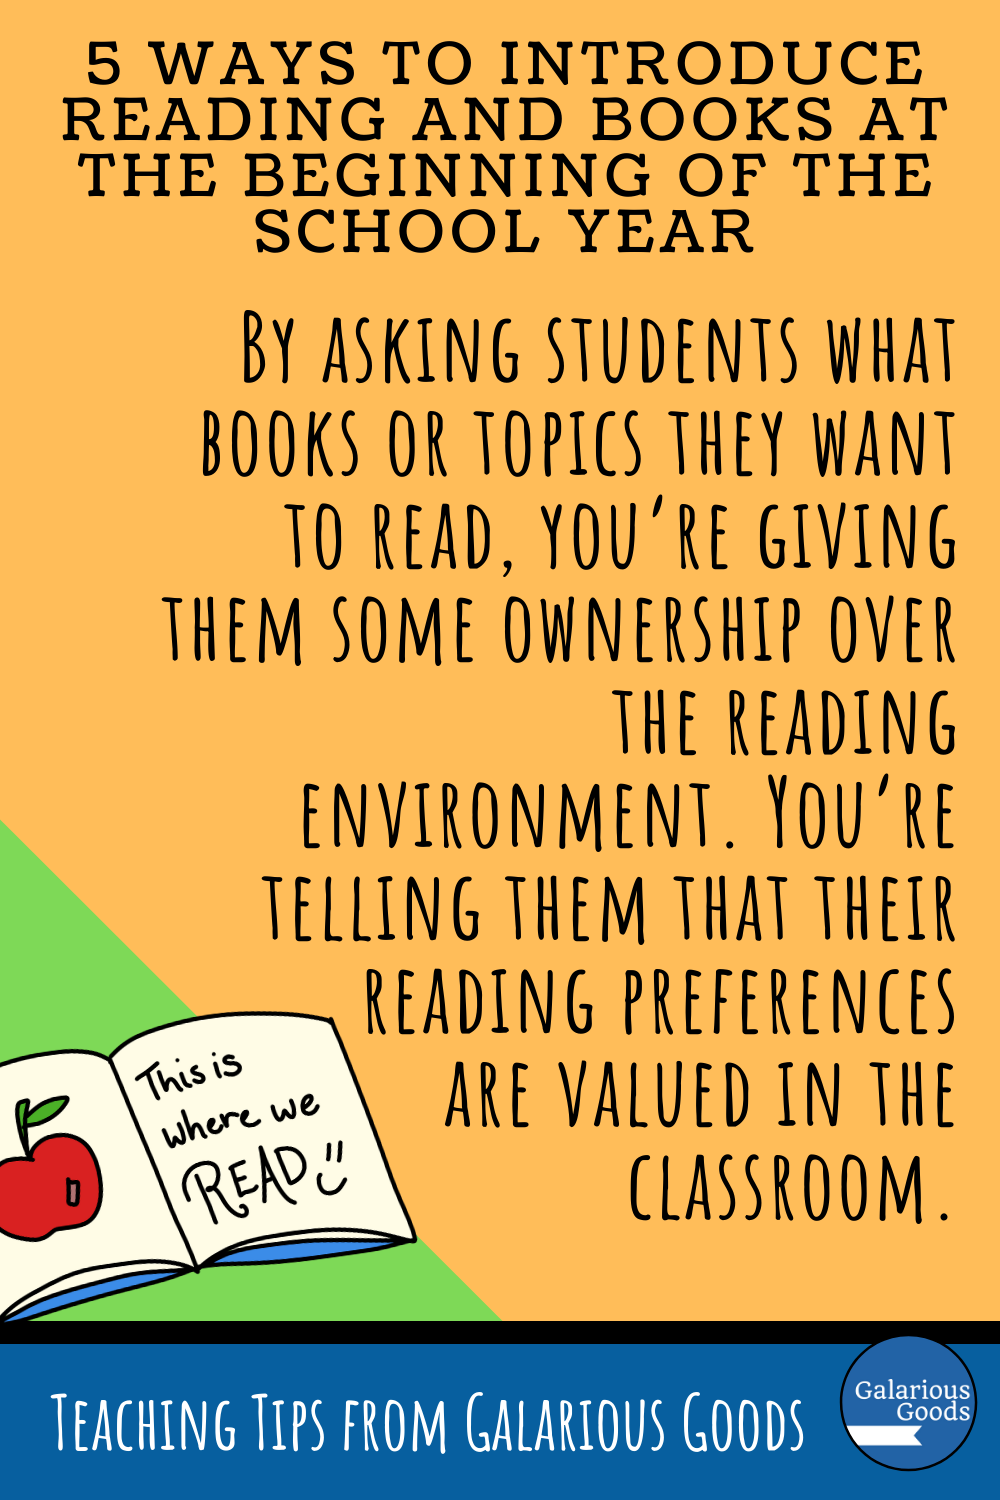
By asking students what books or topics they want to read, you’re giving them some ownership over the reading environment. You’re telling them that their reading preferences are valued in the classroom and that it’s a safe place to read all kinds of books.

 
5 Ways to Introduce Reading and Books into your classroom at the beginning of the school year. A back to school literacy and literature post for all teachers.
 

3. “Sell” a Book or Two

Book talks are one of my very favourite tools for encouraging reading in the classroom. I love them so much, I wrote a whole post about them and how to give a book talk. At the beginning of the school year it’s good to use books which might be unfamiliar to the students. This lets the students know that you love finding books they might not know about and that it’s ok to read and enjoy unfamiliar books. 

Book talks are great for generating excitement about a book and therefore excitement about reading. With lots of enthusiasm, or a well placed preview of a book, you’ve shown students that it’s ok for books to be exciting. Be aware that a really exciting book talk might generate a lot of enthusiasm for the book - you might need to create a ‘next in line’ list for potential readers. 

4. Ask Students to Write About their Ideal Book

What would the best book in the world look like? This is a great question to pose to students early in the school year. As well as getting students interested in what books could be (or what books they may not have found yet) this is a great way to learn a bit more about your students.

Be aware, though. There’s a very real possibility that you’ll have a students or two who’ll say there’s no such thing as a good book. It’s ok to get them to explain why that’s the case (they’re still writing and you’re still learning about them!) or to challenge them a little to write about what a book would have to have to be readable by them - they might like to link it to what they like about games, television shows or other activities.

5. Let Students Know Where They Can Find Books

Once you’ve got students excited about reading, you need to let them know where they can find books. You may have a complete classroom library or a small collection of books in the classroom - let students know what they can access at any time or what books you’ve set aside for classroom lessons. Take your students to the school library and talk about some of the borrowing they can do there.

You might also like to introduce the local library to your students. You can do this by visiting yourself and taking some photos of the different areas or you might like to arrange a visit from a librarian at the library who can help your students to understand what’s available to them there (it’s not unusual for people to think they need to pay to borrow books from the library.

How do you create a reading environment in your classroom at the beginning of the school year? Leave a comment below to let us know!


Bringing Book Characters to Life in the Classroom with Collage

Are you looking for an alternative to character profiles in the classroom? What about giving this project an artistic twist? You could always try some collage . . . 

 
Bringing Book Characters to Life in the Classroom with Collage. A teaching and learning blog post exploring an art alternative to character profiles and a way to explore texts more deeply #characterprofile #bookstudy
 

A collage is a piece of art created by combining different elements. In the classroom we often see collages made from coloured paper and magazine or newspaper cut outs, but you can also use fabric and other textiles, recycled materials, photos and other materials.

A collage is a great way to represent a character since it allows the creator to show different elements of a character and even the experiences they have throughout the story. It can be used to show a snapshot of a book or as a book report alternative.

Here’s one way you might like to approach this activity with your class

1. Identify the Features of the Character

The collage begins with planning. That may not be too exciting for the students, but it allows them to produce a higher quality piece of work and allows them to demonstrate that they really understand the character and the book.

Students need to identify the features of the character - the characteristics they want to represent in the collage. They might also like to represent relationships the character has in the story or make a reference to some of the most important events in the book.

2. Use Colours, Images and Shapes to Define the Character

Students need to consider what kind of collage they want to create. Are they beginning with the shape of a person (or animal, if the character is an animal!) and filling it in with collage. Or are they intending to fill the whole page with different elements of the character. This might be a decision you wish to make for the students - you can even provide them with outlines of bodies or heads - or you may like to let them make this decision themselves.

Once they have that worked out, students need to start adding in the material. What they use will be dependent on many things - including classroom resources, time and space, but you might like to ask students to bring in material from home, you might like to provide them with additional resources, or you might like to restrict them to particular materials - such as scrap paper in the classroom or recycled packaging or coloured paper.

Remind students to refer back to their characters’ features as they choose their materials, how much of it they want to use and how they want to place it.

 
Bringing Book Characters to Life in the Classroom with Collage. A teaching and learning blog post exploring an art alternative to character profiles and a way to explore texts more deeply #characterprofile #bookstudy
 

3. Adding Text and Other Features

Once the student has the basic shape of their collage down, they might want to consider what else they can use to make their collage meaningful. Some students might want to add words - they can use the features they started with - to highlight certain characteristics. Others might want to add a paint wash over the top to highlight some parts and dull others. Bits and bobs like sequins, bottle caps, beads, string or wool might be interesting additions, or students might like to choose nature elements such as leaves or sticks.

Don’t forget you may like to let the initial work dry before adding extra material.

4. What Can a Collage Tell Us?

Once students have finished their collages, they should take the time to reflect on their work and the choices they made. This can be done by writing down some ideas, by engaging in a discussion with the teacher, by recording their voice or by making a video. Students can point out the different features they have represented in their work and why they made those particular choices based on what they know about the character. 

Have you created character collages in your classroom? Share your experiences in the comments


How to Use Book Talks to ‘Sell’ Books to Your Students

So, you’ve just bought a brilliant book to add to your classroom library. But how can you ensure that it doesn’t sit there, unloved and dusty? How can you make sure it gets into the right hands? The answer is . . . the humble book talk.

 
How to Use Book Talks to ‘Sell’ Books to Your Students. A teaching and learning blog post about increasing student interest and engagement in reading through using book talks #booktalk #readerengagement
 

What is a Book Talk?

A book talk is a speech or talk recommending that others read a particular book. The person giving the book talk stands or sits in front of their audience (or films or records themselves for their audience) and shares information about the contents of a book. They are working to convince the listener that they absolutely HAVE to read the book.

Teachers are well placed to give book talks to their students. They’re already there in front of them. In many cases they’re selecting (and buying) the books for the classroom. And teachers often have great relationships with their students. 

But what do you need to know when you’re planning to give a book talk?

What Do They Need to Know?

You should definitely start a book talk with the title, the author and the basic premise of the story. Students will want some information about what it’s about - but the challenge is sharing that without giving away too much information.

If the author or illustrator has created other books which are well known in the classroom, you might like to mention that. Students can be very loyal to creators who have given them a good experience in the past.

 
How to Use Book Talks to ‘Sell’ Books to Your Students. A teaching and learning blog post about increasing student interest and engagement in reading through using book talks #booktalk #readerengagement
 

You Know Your Audience . . . So Don’t Forget to Hook Them In

As the teacher, you’ve usually got a pretty good idea of the likes and dislikes of your students. Remember this when you’re talking about the book. What parts of the book will appeal to your audience? Will they like the characters? The language used in the book? The plot? The appearance of a character from another story or series? Make sure you refer to those parts in your book talk.

Tell your audience enough about the book to get them interested and then stop . . . let them read the book to find out what happens next. If it’s a novel, you might even like to read a little from the book to make it extra intriguing. 

It’s Ok to Share A Personal Response

While you don’t have to tell your students every thought you had while you were reading the book, you might like to share some information about how the book made you feel or how it’s connected to an experience you’ve had. This both gives the students more information about the book and allows them to see how it might connect with someone.

Don’t forget to be enthusiastic either! Try to get the book into hands as soon as possible (though you may need a sign up system for this!)  Use the book as a prop if you can so students can see the cover and remember it in the future.

Challenge them to give the next book talk

While it’s great for teachers to give book talks, students can be the best ambassadors for new books in the classroom. If students are interested in giving book talks, you can always offer them a new book and ask them to read it and talk about it. Letting your students ‘sell’ the books can help them jump into hands like hot cakes!

Do you use book talks in your classroom? Tell us about your experience in the comments


How Not to Teach the Vocabulary of a Novel (and 4 ways to teach it instead)

Are you about to read a new novel with your class and you want to concentrate on vocabulary? Here’s a cautionary tale about how not to teach vocabulary with a classroom novel . . . and four ideas to improve vocabulary when exploring a novel sized piece of text.

 
How Not to Teach the Vocabulary of a Novel  - and 4 Ways to teach vocabulary instead. A teaching and learning blog post exploring the role of vocabulary in novel studies #vocabulary #novelstudy
 

When I was in high school, we were assigned a classic novel to read as a class. This classic novel was filled with vocabulary words which were unfamiliar or less familiar to us. To help us with this, our teacher gave us a vocabulary list . . . and then told us to define every word as we read the novel.

It turned the reading experience into an absolute slog. Every time I read a new chapter, I had to haul out a dictionary (these were pre-internet dictionary times!), search for the words in the list, look them up, write out the definition and then figure out what it meant in the context of the text. By the time I got a few pages into the chapter, I’d forgotten what happened at the start of the chapter and I’d have to start again. It completely frustrated the whole class and many students gave up on the novel altogether.

But how can you still focus on vocabulary without taking away the enjoyment of the novel? Here’s four ideas to try in your class - don’t forget you can mix and match them as you like.

1. Introduce Vocabulary Before You Start

One thing to reflect on is why you are exploring vocabulary. If you’re teaching dictionary skills, that can be done with any collection of words and probably shouldn’t be connected to a novel. If you’re trying to make it easier for students to understand the text, though, why not introduce any complex words before they start?

This is a great way to use vocabulary lists. Present them to the students before you explore a chapter or make them available for students to access while they’re reading. Students can use the list to identify any words they’re not sure of, they can engage in discussions about what those words might mean or they can look them up.

By doing this, students aren’t spending ‘busy time’ defining words they already know the meaning of and they’re already aware that there’ll be some words which they’ll have to think about when they’re reading. If they haven’t looked them up yet, they might be able to use context clues to get a better understanding of the word, if they have looked them up, then they’ll approach the text with that additional knowledge.

This is also a good way just to get students thinking about language used in a book, even if they don’t define them. They’re seeing that words and word choice is important, allowing for further discussions about this while they read.

 
How Not to Teach the Vocabulary of a Novel  - and 4 Ways to teach vocabulary instead. A teaching and learning blog post exploring the role of vocabulary in novel studies #vocabulary #novelstudy
 

2. Go On a Vocabulary Hunt

As students read a chapter or several set chapters, challenge them to find any interesting words - or words which are used in interesting ways. Students can make a quick note of these words in their notebook or on a post it note to come back to later.

When they’ve finished reading, students can compare the words they’ve found. They might like to see if there were any words which several students identified and discuss why those words stood out to the students. Students can also compare their words with a prewritten vocabulary list or make their own vocabulary list for the chapter or chapters.

Once students have these words they might like to add them to a classroom display of words or an online shared file. This student led activity opens the door for further exploration of the language used and serves as a prompt for students to use some of these words in their own writing.

3. Examine a Vocabulary Word in Context

This requires only one vocabulary word. However, if you have a lot of words to explore, you can assign different words to different students or different pairs of students. Ask the students to locate the word in the text and to write down the sentence it’s used in. The students can then explore how it works within the sentence - what type of word is it? Does it evoke a feeling or an emotion? Is it part of figurative language?

When students have discussed the word, they can try substituting a different word into the sentence. They can examine it to see if another word could work better or how it might change the sentence if another word was used.

 
How Not to Teach the Vocabulary of a Novel  - and 4 Ways to teach vocabulary instead. A teaching and learning blog post exploring the role of vocabulary in novel studies #vocabulary #novelstudy
 

4. Group the Vocabulary

Once students have a group of vocabulary words - either from a vocabulary list or a group they have created themselves, students can look at how these words might relate to each other. Students can organise the words into smaller groups, based on any characteristics they like. Working in a small group or partners, they can discuss why different words might belong in a certain group or why they should be in a different group. They can then try to rearrange them into new groups based on different characteristics.

This activity is a way of making the vocabulary from a novel more familiar to students, so they are more likely to identify it if they come across it in another context. Allowing students time to give characteristics to a word or to make connections with other words, allows the words to become part of their schema - generally making them better readers!

How do you teach vocabulary when you read class novels? Share your experiences in the comments.


Just Empty Your Head! How Students Can Create a Brain Dump When They’re Reading

“Just hold all these complex ideas in your head. Then add in some new vocabulary. And form some questions. And don’t forget to make predictions!”

What are we asking students to do when we ask them to read a complex text or a novel? When you start to break it all down, it’s easy to see that students are being asked to recall or process several things at the same time. And that is, of course, an incredibly important skill to have. But how can we scaffold this to ensure that every student in the class has success with the more complex task? Enter . . . the brain dump!

 
How Students Can Create a Brain Dump When They’re Reading. A teaching and learning blog post exploring different methods for students to show understanding of texts and to create reading connections. #readingskills #teachingreading
 

What is a Brain Dump?

Essentially, a brain dump is the act of taking everything that you’re thinking . . . and putting it down onto paper (or a technological alternative). Many people use them when they’re feeling stressed or anxious or overwhelmed; it allows people to grab all of the nagging little thoughts in their heads and put them into a tangible form. They’re also great if you’re in the habit of ‘remembering’ all of the things you need to get done in a day or a week. By putting them down onto paper you have something to help you remember, loosening the mental load just a little.

“So, that sounds great . . . but how does it work when you’re teaching reading to children?”

Using a Brain Dump when exploring a book

As I pointed out, reading a text involves a lot of different actions, particularly if the text is longer or is complex. There’s characters to remember, settings to put into place, plots to follow. There’s the basic act of decoding, then there’s understanding the vocabulary - either by using context clues, remembering words or by using word roots. Students then need to make predictions of what might happen next or why they think a particular character acted the way they did or why the author might have chosen to use that particular word. The act of reading is a complex one!

By creating a brain dump, students can get everything they’re thinking about the text out of their head and onto the page. They’re able to see what they do and don’t know and use their brain dump to create new connections. 

“That’s great . . . but how do we teach it?”

 
How Students Can Create a Brain Dump When They’re Reading. A teaching and learning blog post exploring different methods for students to show understanding of texts and to create reading connections. #readingskills #teachingreading
 

How Do We Teach Brain Dumps for Reading

It might be best to start with a short piece of text - a poem or a picture book - which is familiar to the students. On the first read through, students should simply listen to the text. On the second read through, you demonstrate the brain dump. As you read through it again, model writing down everything which comes into your head - from observations on the characters’ names (“Oh, that dog is called Trevor. I went to school with a Trevor. Just like the Trevor from Fireman Sam . . .“) to questions (“I wonder why Pig never seems to learn his lesson. Or does he learn his lesson and just constantly make new mistakes?”) to random thoughts which are unconnected to the text but came into your brain anyway (“I wonder if it’ll be wet at lunch?”)

Once you’ve modelled your brain dump you can use the same text or another familiar text for the students to have a try. Remind them that it doesn’t need to be perfect - it’s not being used for assessment - it’s just a way of helping them better understand the texts they are reading. Give students plenty of opportunities to practice - remembering that they can be used with texts students use in history or civics, science or technology as well.

Tip: Students can use any piece of paper - or a computer or tablet - for brain dumps. However, you can find a range of free brain dump templates by signing up for the Galarious Goods free resource library.


“Ok, I get that. But what do we do with them once we have them?”

Using the Brain Dumps

Once students have their brain dumps, they can use them in a range of ways. Again, this is something you might like to model to the students - but they might also develop their own ways of using them, which they might like to share with their classmates.

Students might like to use their brain dumps for basic recall references. They allow students to write down the important characters or the important dates and events, something to refer back to when they need them. Or they could use them to brainstorm questions they might like to ask about the text, going back through their information to see where there are any queries.

If students create brain dumps for two different texts, they might like to use them to find connections - once they see the information written in front of them, it can be easier to see where those themes or ideas overlap. Students might also like to share their brain dump with a classmate to see how different people have responded to the same text.

Have you used brain dumps for reading in your classroom? Tell us about it in the comments!


Drawing and Describing a Place: Exploring Settings in Novel Studies

How important is the setting when we’re exploring a novel? For some people the obvious answer is - well it depends on the novel. But many novels we explore in the classroom have rich and vivid settings and many of those settings benefit from a closer look. Here’s one easy way you can explore the settings when you engage in a novel study with your class.

 
Exploring Settings in Novel Studies. A teaching and learning blog post exploring settings in novel studies and how drawing and describing them can help students understand them better #novelstudy #ela
 

Why settings are important

There are a range of reasons why settings are important to our stories. Sometimes even the seemingly mundane setting - a school or a suburban house - still tells us a lot about our characters and the events which are happening. But many settings are important for other reasons.

Sometimes the setting plays a starring role in the action of the story. The twisty path which requires Annemarie to move a little slower in Number the Stars has a direct impact on the events of the story. Similarly the magic of Terabithia comes as much from the place itself as it does from Jess and Leslie playing there with their imaginations - and has a direct impact on the most important part of the story. The different places Rowan and the other characters journey through in Rowan of Rin often decides who can go on and who will have to stop the journey at that point.

Other settings set the scene to allow us to better understand the story. Barringa East Primary tells us so much we need to know about the whole neighbourhood - and Erica Yurken - when we read Hating Alison Ashley. The refugee camp and then the detention camp which Jamal and Bibi find themselves in during Boy Overboard allow us to see both opportunities and hopelessness. 

Sometimes the settings allow us to ask more questions. What does Coraline’s other house tell us about her real house? What does Leslie’s house tell us about her and her parents in Bridge to Terabithia? Why do the Rangers live tucked away in little cabins in the Ranger’s Apprentice books?

 
Exploring Settings in Novel Studies. A teaching and learning blog post exploring settings in novel studies and how drawing and describing them can help students understand them better #novelstudy #ela
 

Why should we draw the places?

Once we recognise that the settings are important, we need to look at how our students can further explore them. One easy way is to look at what that setting contains.

By drawing the settings, students are looking at them from a different point of view, away from the words on the page. Students may not draw a setting perfectly, but they can think about what details they should include, beginning to think about which features are the most important. Students can also use this experience of drawing the setting to develop more questions about it. They might ask why an author chose to include a particular detail or why one aspect of the setting was more important to the main character than another.

Students can go further by labelling or annotating their drawing. They can add words, arrows or symbols to their drawing to add extra meaning or to help them gain a better understanding of the place created by the author.

Another way to draw the setting is from the bird's eye view, like a map or a diagram showing the different elements of the place. Students might like to combine a map and a drawing to show a better understanding of the setting.

Why should we describe the places?

Once students have moved the words from the book into pictures on a page, they can go back and describe the setting in their own words. This helps students to cement their understanding, to show how the characters interact with the setting or how the setting plays a role in the narrative.

An easy way to write a description is to think about what the setting looks like, what it sounds like and what it might feel like to the people who are standing in that setting. This way of describing a setting ensures that the experiences of the characters is related back to the setting. Students can also write a more traditional description or they could reflect on how a stranger or a different character might describe the setting differently to the main characters. 

These words and drawings can be placed together and students might like to return to one or both of them to adjust them as they continue to look at the novel. You can also combine the different drawings and descriptions in the class, allowing students to explore the different ways their classmates experienced the same setting. This is a great activity to put together as a classroom display or to show in the school office or the school library.

Have you drawn and described settings with your students? Share your experiences in the comments!


Using Back to School Reading Tools in Your Classroom

We all understand how important reading is in the classroom. But how can we ensure we make reading important from the very first day of school?  Here’s some tools you can use to create a reading friendly environment in your classroom as part of your back to school preparations!

 
Using Back to School Reading Tools in Your Classroom. A beginning of the school year post about prioritising reading in your classroom as a teacher. A Galarious Goods blog post
 

1. Tools to assess where students are

  • Unless you’re teaching first year of school students or students who are new to the school, it’s likely that your students have participated in reading testing - they might even have a reading level recorded. Don’t ignore this! Use this as a launch pad for your own reading testing.

  • Your school probably has a system of reading testing. If you’re new to the school (or to teaching) ask around to find out what it is and jump into it as soon as you can (it can be a HUGE job). If your school doesn’t have a testing system, grab a couple of texts (easier, at grade level and harder) and ask students to read them to you individually. This gives you a starting place to work from.

  • As well as assessing reading level, consider assessing how your students feel about reading. Do they like reading? What do they like reading? Where do they like reading? When do they like reading? What are their past experiences with reading? By asking these questions, you’re showing students that their experiences and feelings about reading are real and valid, and getting a better introduction into the reading life of your students.

2. Tools for setting goals.

  • Before you set reading goals with students, you might like to spend some time exploring what reading goals might look like. Students might focus on reading levels or skill attainment, and that’s great, but student reading goals can also look like the reading goals of adults. Students might like to engage in a reading challenge to try different books, work towards reading a certain number of books, aim to write book reviews for some of the books they’re reading or participate in book discussions with their classmates.

  • Students should reflect on what their goal would look like and how they’d know that they achieved it. This might mean creating a recording chart for their goal or they might write a journal reflecting on the work they’re doing to achieve their goal.

  • Don’t forget to ask students what they’ll need to achieve their goal. For some students it will be access to a wide range of books. Others will need time to read or materials to draw up their recording chart. Some might need to learn how to write a book review, or how to use a dictionary effectively. This is a great discussion to have in individual reading conferences allowing students to make choices and take responsibility, while also showing them that you care about their reading goal

 
Using Back to School Reading Tools in Your Classroom. A beginning of the school year post about prioritising reading in your classroom as a teacher. A Galarious Goods blog post
 

3. Tools for creating the environment

  • What does your classroom tell your students about reading? Stand in the doorway and look in. Have you got any books on display? Have you got a classroom library or a reading corner? Are there posters about reading or books? Think about what message you want students to get about reading as they walk into the classroom and see if there’s anyway to make those messages obvious.

  • Establishing a whole classroom library can be expensive, but choosing a few books to display can still prioritise reading without breaking the budget. Your school library or local public library may have a selection of books, and you can coordinate these with subjects you’re going to cover in history or science. 

  • There are so many posters related to reading which you can display in your classroom. You might include posters of book covers, posters recommending different books, posters with book genres. You might have posters with sayings or quotes about reading. Printable posters (like these ones) can be found easily at TeachersPayTeachers, then printed and laminated to use year after year. 

  • Creating a reading corner is another way to show students that you prioritise reading. A reading corner might be themed and decorated, but it might just include somewhere to sit, some posters and a collection of books.

  • Don’t forget to include written recommendations in your classroom! You might start with recommendations from yourself, or you could include recommendations from other teachers in the school, your own family members - even your family pet! (Our chickens are fond of  The Fabulous Friend Machine by Nick Bland). Recommendations don’t have to be long - a line or two could be enough to grab the attention of a curious reader.

4. Tools to make reading fun

  • Is reading fun in your classroom? Before the school year starts, think of some activities to bring reading alive for your students.

  • Students might like to incorporate STEM with reading and design a book holding machine (so you can eat and read at the same time) or design a way of keeping books safe in the rain.

  • You might like to have some funny and engaging books ready for the first day of school. Take a little time to read the first few pages - or a particularly funny bit - aloud, then offer the book for students to read (or create a list for read alouds throughout the year)

  • Allow students the chance to explore some of the books they might like to read that year. Work with your school librarian to explore the library or hold a book tasting in your classroom. 

How do you embrace reading at the beginning of the school year? Share your tips and ideas in the comments!


3 Ways Students Can Use Folding Resources to Explore Characters

You probably know how much I love interactive notebook resources! So far I’ve written two blog posts exploring how to use them to explore vocabulary and how to make comparisons. But as someone who adores book studies, I couldn’t resist sharing some ways you can use interactive notebook resources to explore character. (Don’t miss the free resources as well!)

 
3 Ways Students Can Use Folding Resources to Explore Characters. An exploration of interactive notebook resources for book studies and more. A Galarious Goods Blog Post


These folding resources use a picture of the character’s face (or the whole character) to combine creativity and understanding of the character in one resource.

Students are provided with a ‘cover’ image of the character with a side or top tab. They cut around the outside, then fold the tab on the dotted line. The tab is pasted into their notebook or onto paper and the cover is lifted so students can write about the character under the cover.

This is a really adaptable resource because students can use a template or create their own character images. As long as they include a side or top tab, it works as a folding resource.

Take it further

  • Students can use it to explore a character they’re writing about

  • Students can work in pairs or small groups to explore all the main characters of a book. These can be put together to create a display

  • Students can recreate a ‘scene’ from a book with the lifting character resources.

2. Circular Character Folding Resource


A circular folding resource is a great way for students to explore particular characteristics of a character.

Students cut out the circle and between the tabs, fold up the tabs, then paste the middle into their notebooks or into paper. The top of the tabs include different aspects of the character for students to explore - they write the answers to these under the tabs.

Take it further

  • Students can create multiple folding resources to make a display.

  • Students can use this in their own creative writing to assess the characters they’re writing

3. Character Booklet Folding Resource


This is a great way for students to take a really in-depth look at a character. Students can use a folding booklet to explore questions like what kind of character they are, why they behave the way they do and their relationships with others in on compact resource.

Students cut out the folding resource on the solid lines and fold in the sides on the dotted lines. They answer the questions on the inside, then add details or decorate the outside.

Take it further

  • Students can leave off the name of the character and challenge others to work out who the character is

  • Students can use these as part of a ‘book talk’ or ‘book promotion’ for a character

  • Students can create these as assessment for a particular book


3 Ways Students Can Use Folding Resources to Make Comparisons

I love folding resources and interactive notebook resources. They’re a great tool students can use to understand, remember and share content and ideas. I’ve previously shown three ways you can use folding resources to explore vocabulary. Today, here’s three ways students can use folding resources and interactive notebook resources to make comparisons.

 
3 Ways Students Can Use Folding Resources to Make Comparisons. Explore these three different types of interactive notebook folding resources perfect for students to create comparisons on different topics. A Galarious Goods Blog Post


This resource uses a background and flaps to compare different characters, people in history, events and more. Students attach flaps or tabs to the sides or the middle of the background sheet, with a heading or headings on the outside of the resource and the similarities and differences or characteristics under the flaps.

This is particularly good when looking at the similarities and differences of characters. Students can write the character names on the front of the resource and lift one flap to share the similarities and the other to share the differences. You can also extend the resource to 4 or 6 characters and write some of the qualities of each character under the tabs.

Because this organiser just uses straight lines, students can easily make their own. Or you can download the free resource to get a printed copy.

2. Sliding Resource


This resource uses a folded ‘sleeve’ and an insert card to make comparisons. When it’s completed, the students can slide the insert card back and forward to see the comparisons. These can go into notebooks or be used to create classroom displays - especially for complex topics or novel studies.

Students make the sleeve by folding the two side sections backwards and fastening them behind the middle section. The card - which has a dividing line in the middle - then slides through.

This would be particularly good when exploring government or civics topics. Students could compare different levels of government, the roles of different people involved in government or even different types of government.

3. Turning Card Resource


This resource includes a pocket and an insert. The insert is created by folding a piece in half and fastening it together. Students can write about one thing on one side and one on the other (or similarities on one side and differences on the other. These can also be used to make a wall display.

The tabs on the pocket are folded back so they are tucked behind the main part of the pocket. These tabs are then fastened to the page or display board. The prepared insert goes inside the pocket and can be taken out and ‘flipped’ as required.

As well as characters or events, this can be used to compare settings of books, famous historical figures, things from a long time ago and things from now, different books - even different animals!


5 Ways to Plan and Differentiate for Young Gifted Readers: Part Two

 
5 Ways to Plan and Differentiate for Young Gifted Readers Part Two. A look at vocabulary, reading choices and differentiating classroom activities for gifted readers. A Galarious Goods Blog Post
 

Note: While this blog post is aimed at teachers in Kindy/Prep/Reception, Grade 1 and Grade 2, many of the ideas are adaptable or applicable to older grades as well.

3. Expand Their Vocabulary

Like background knowledge, vocabulary is something you develop with more time, more reading, more conversation, more exposure to different experiences and . . . well, more time. Asking 5, 6 or 7 year olds to automatically have the same vocabulary as older students is a tall ask.

While many of these young gifted readers have wide and varied vocabularies, it’s very possible that they have gaps in their vocabulary knowledge or that they are missing vocabulary understanding when it comes to particular subjects. While they can continue to grow their vocabulary through reading, it’s important to provide opportunities for students to see vocabulary as something you can work on, something to strive to improve at.

Parents of gifted readers will tell you that it’s incredibly frustrating to see sight words or high frequency words come home which are well below the level of their children. These are often accompanied with instructions to ‘learn them’ to ‘laminate the cards’ or to ‘check Pinterest for fun activities’. While these are excellent ideas for students who are learning these words, they leave parents of gifted readers wondering whether their child is being catered for at all, and what possible alternatives there are to sight word activities.

Offering a vocabulary list instead of sight word list is an easy way to differentiate this kind of homework (or school work) for gifted students. Like sight words, you can offer a few easy activities - look up the word, write a sentence with the word, see if you can spot the word in a book, draw the word - for students to complete in the classroom or at home. You can find or suggest additional ideas through Pinterest or extend students with ideas like using folding resources.

You can also help young gifted readers to extend their reading by teaching them how to look up word definitions in a dictionary. Students can develop the skills of finding words, looking at multiple definitions and (at times) looking up more words so they really understand the definition. This is a skill they’ll be able to use for years to come!

How do you make it work in a busy classroom?

You can create or find vocabulary templates (or teach students to draw up their own) so students can engage in vocabulary work at a range of times.

To find vocabulary lists, search online for a few years above the grade level of your students (this is where testing will assist you in knowing what level your gifted readers require) - there’s a lot available! A number of subject lists are also available.

To teach dictionary skills, see if you can work with a range of teachers across different grades to put together a small group of students who would benefit from learning these skills. If you have a teacher-librarian, they might be able to put on a little workshop for the students or you may be able to work with your Principal or Curriculum Leader to release a teacher to teach dictionary skills.

4. Support their Reading Choices

This one is especially important when it comes to school libraries. Many, many young gifted readers have experienced the deflating experience of visiting the school library only to be told, ‘No, you can’t borrow that’.

When questioned, various reasons are given for this refusal: the book is too hard (even if the student has borrowed harder books previously); they can’t comprehend it (even if they have other books in the series at home); the subject matter is too old for them (even if parents have given permission); it’s just school policy.

If it’s school policy, then it’s bad policy - designed to dull a love of books and libraries (which should be enjoyed as the magical places they are). As a teacher, I recommend finding out whether your school has a policy like this and whether it should be updated to allow for the fact that some younger children read harder books - or that their parents are happy to read harder books to them.

As for the other reasons, they usually stem from a lack of knowledge of the student (that’s where you - as the teacher who knows the student - can step in) or concern about parent reaction. One teacher librarian told me that her school solves that issue by asking parents for blanket permission, then recording that permission so students don’t have to ‘re-ask’ every year.

Getting to know the books in the school library allows students to explore a really wonderful range of books in a place where they are regular visitors. If you don’t have a school librarian, or your school librarian is reluctant to recommend books suitable for your gifted readers, consider finding an older ‘reading buddy’ from a higher grade - someone who loves books and reading and will share some of the delights of the school library with your students.

How do you make it work in a busy classroom?

Keep an eye out for advanced readers - anyone who might be reading more than picture books - before you start library borrowing. A quick note home to parents can help you get parent permission. You can then note this on a note you attach to the library box or basket or a tag attached to the child’s library bag. This way, you know who has permission at a quick glance.

 
5 Ways to Plan and Differentiate for Young Gifted Readers Part Two. A look at vocabulary, reading choices and differentiating classroom activities for young gifted readers. A Galarious Goods Blog Post
 

5. Differentiating Your Classroom Lessons

A gifted reader with excellent decoding skills will not be served with lessons purely aimed at decoding. And while some phonics lessons are excellent for spelling, constant repetition is also unhelpful if the gifted reader is already understanding and applying those lessons.

However, busy work - asking a gifted reader ‘just to read their book’ or to just do -more- of what other students are doing, isn’t respectful to the student either. They have a right to learn to the best of their potential - just like any other student in the class.

When it comes to differentiating for the gifted reader, it’s important to know where they can continue to learn (it all comes back to the testing!). Do they need to learn comprehension skills which help them with texts on unfamiliar subjects? Do they need to extend vocabulary knowledge? Should they begin to explore responding to texts through reviews or reader reactions? Or could they learn more about sentence structure and grammar so they understand why a sentence works - or doesn’t work?

Vocabulary and comprehension skills are two places where you can differentiate for students. If the class is concentrating on reading a particular book, you could ask gifted students to ‘insert’ or ‘substitute’ a range of provided words into the original text and to work out where they would be effective (a great way for students to apply their vocabulary understanding with words they have previously defined). You can also provide deeper thinking questions for students to reflect on while the class is reading particular books.

Retelling stories in different ways, creating questions for stories or other texts and asking ‘what if . . .?’ questions are all ways that students can extend their thinking about stories. And sometimes differentiation can be as simple as using correct terminology as well as easier wording when talking about sentences - pointing out that descriptive words are also known as adjectives provides a framework for students as they explore sentences in more detail.

How do you make it work in a busy classroom?

This can be the hardest thing to make work in a busy classroom, but the more you do it, the easier it will become. Remember that differentiation doesn’t always need to be a whole new lesson - it’s ok to repeat activities like writing reviews (even adult book reviewers improve by repeating this!), creating questions, finding effective words in texts or asking ‘what if . . . ‘ questions. And sometimes differentiation can happen just by offering an alternate text.

When you’re planning, ask yourself if there are any skills your gifted readers will need to explicitly learn - whether it’s how to write a review, use a dictionary or what a verb is. You may be able to work with teachers of other gifted readers to make this one group during literacy rotations, or you may be able to work with one or two gifted readers during silent reading time or individual learning time. And remember, even if your gifted readers are working on self-directed work - make time to check on their understanding and to show them that their reading is valued in your classroom.

Have you read Part One of this post? It covers testing and offering a range of texts and is a must read!